


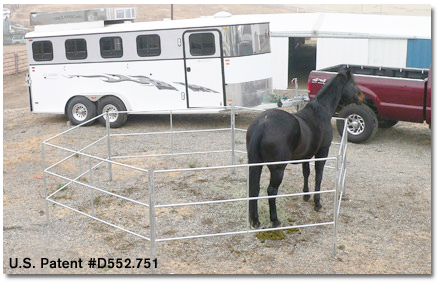
Single Horse
|
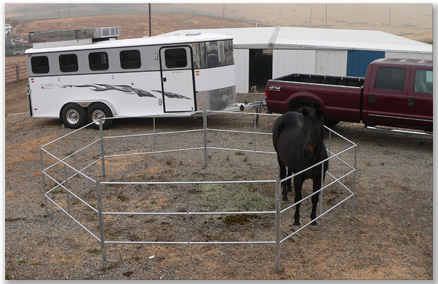
Single Horse
|
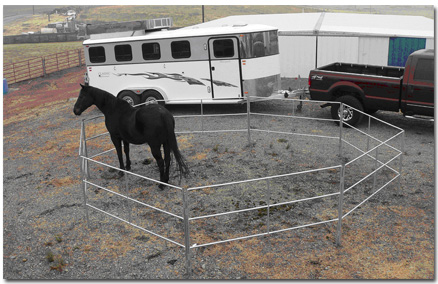
Single Horse
|
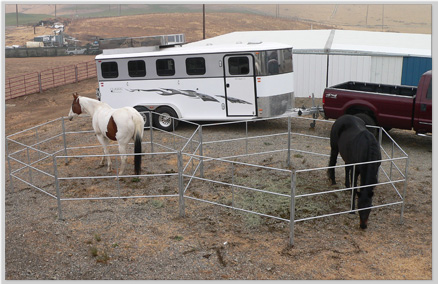
Double Horse
|
We have integrated the Flex Slider with Weebly's Drag and Drop/Click to edit functionality. You shouldn't need to edit any code unless you want more than the default
number of sldes (3)
We have provided Three pre-styled captions that can be inserted using the Embed Custom code element within the weebly dashboard. The Code you need to insert for different caption types can be found below:
Caption Box (Light)
Caption Box (Dark)
Caption Box (Color)
2. search for (CTRL + F) **ADDITIONAL SLIDES**
3. On the line below **ADDITIONAL SLIDES** for each additional slide you want to add, copy and paste this code in
NOTE: YOU WILL NEED TO REPLACE THE ? WITH THE NUMER SLIDE IT IS... EG (Frist Addition slide will be number 4, second 5 etc)
Adding Captions to each slide
Each slide has a drag and drop content area in which captions can be added.We have provided Three pre-styled captions that can be inserted using the Embed Custom code element within the weebly dashboard. The Code you need to insert for different caption types can be found below:
Caption Box (Light)
<div class="caption-box-content light">

<div class="inner-caption-box-category">

<h6>**Enter Title here**</h6>

</div>

<div class="inner-caption-box-title">

<h1>**Enter Subtitle here**</h1>

</div>

<div class="inner-caption-box-content">

<p>**Enter Text Here**</p>

<a class="wft-btn wft-btn-black" target="_blank" href="#">**Button Text Here**</a>

</div>

</div>
Caption Box (Dark)
<div class="caption-box-content dark">

<div class="inner-caption-box-category">

<h6>**Enter Title here**</h6>

</div>

<div class="inner-caption-box-title">

<h1>**Enter Subtitle here**</h1>

</div>

<div class="inner-caption-box-content">

<p>**Enter Text Here**</p>

<a class="wft-btn wft-btn-black" target="_blank" href="#">**Button Text Here**</a>

</div>

</div>
Caption Box (Color)
<div class="caption-box-content color">

<div class="inner-caption-box-category">

<h6>**Enter Title here**</h6>

</div>

<div class="inner-caption-box-title">

<h1>**Enter Subtitle here**</h1>

</div>

<div class="inner-caption-box-content">

<p>**Enter Text Here**</p>

<a class="wft-btn wft-btn-black" target="_blank" href="#">**Button Text Here**</a>

</div>

</div>
Adding Additionl Slides In
1. Open the ????? page layout: Design > Edit CSS/HTML > ?????.html2. search for (CTRL + F) **ADDITIONAL SLIDES**
3. On the line below **ADDITIONAL SLIDES** for each additional slide you want to add, copy and paste this code in
NOTE: YOU WILL NEED TO REPLACE THE ? WITH THE NUMER SLIDE IT IS... EG (Frist Addition slide will be number 4, second 5 etc)
<li>

{flex-img?:image global="false"}

<div class="flex-caption">

<div class="helper"><h5>Enter Flex Slider Captions Here (Drag and Drop)</h5></div>

{flex-img?:content global="false"}

</div>    </li>
AFFORDABLE HORSE CORRALS
Safe, Spacious & Easy to Assemble
By Default, this Content Ready page uses an image called "home-slider-parallax.jpg"
To use your own image for this Parallax section you must replace the image.
It is important that you name your own image with the same name as the default image (cr-home1-parallax.jpg)
Once you have your image, upload it to weebly by going to: "Design > edit CSS/HTML > add new files"
Upload your file and as long as it has exactly the same name as the defauly one it will automatically overwrite and the new image
will be displayed when you publish your site.
NOTE: To ensure the parallax image displays correctly on larger screens it is advisable you use a large image.
We suggest using an image around 2000x1000px
Transporting Corrals
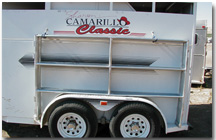
We have what we call panel boots that the panels rest in when they are mounted on either side of your dual wheels.
|
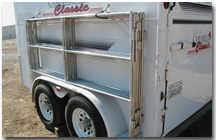
In the picture you can see that these boots are mounted on the steps at either end of the fenders.
|

This will not work on all trailers and it could block windows from being let down during travel, don't give up; we can work with you to solve your mounting challenges.
|
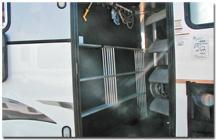
We also have panels mounted inside trailer stalls and trailer tack rooms in many customer trailers.
|
